21 April, 2011

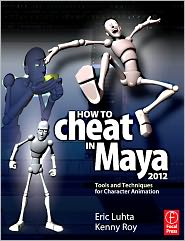
How to Cheat in Maya 2012 ~Kenny Roy/Eric Luhta


Product Description

Fully udpated for the new rev of Maya, "How to Cheat in Maya" offers complete, step-by-step walkthroughs of essential techniques that every animator needs to know. The book is purely about character animation in Maya. It's not a Maya book that covers the software and has one little chapter about animation (most Maya books follow that route). This is an animator's workflow in book form, covering everything you can imagine that has to do with character animation in Maya. The current edition has garnered top reviews and accolades. Professional animators are saying "I wish I had this book in school. It contains much of the knowledge I've gained in the workplace; so you can benefit from it NOW and spend your first few working years learning things ahead of the curve." - Spungella.com (Soak up Animation).

There are books on character animation, and books on Maya, but none have put them together in such a well-thought out effective way for animators to jump right in and succeed. New topics are included: camera settings and animation, expanded spline reference material with more examples, new techniques for working with characters and props, time saving scripts, more personality walks, new tricks for lighting and rendering, and addiitonal rigging techniqes like bendy arms and more squash and stretch.


--The most gorgeous models and lighting will fall flat if the animation is lifeless. Take your animations to the next level with How to Cheat in Maya. Packed with classic animation techniques and insider secrets of a professional animator, this book helps you get things done in the most efficient way possible.

--Covers the 12 principles of animation and how they translate into Maya.

--Lets readers see "under the hood" of a professional animator's work. Maya explained from a character animator's perspective, a unique and overlooked focus. Luhta is both a teacher and an established professional animator. He has worked on high profile films, commercials, and AAA games.

--Companion web site including all exercise/example scene files and extras such as video tutorials, animation files.

--Gold-mine coverage, including character animation techniques, working with constraints, foolproof lighting tricks to show off your work, pose to pose blocking, layered animation, constraints, facial animation, fixing gimbal lock, and more.

--What's NEW in this edition: Coverage of latest rev of Maya, camera settings and animation, expanded spline reference material with more examples, new techniques for working with characters and props, time-saving scripts, more personality walks, new tricks for lighting and rendering, and additional rigging techniques like bendy arms and more squash and stretch.

About the Author

Eric Luhta is a professional animator whose recent credits include "Bioshock 2", "Cloudy With A Chance of Meatballs", "Horton Hears A Who!", and numerous television commercials. Eric has extensive experience with Autodesk's Maya, including teaching it, as an instructor for the Maya Training Program at AnimationMentor.com. He currently lives in Los Angeles, CA with his wife and 3 computers.

Kenny Roy started his career in 1998 and has gone on to animate for TV shows, pilots, commercials, games, web, ride films and feature films, with his most notable credits being Scooby Doo 2, Garfield and King Kong. He is also the founder of Arconyx Animation Studios which has worked for clients ranging from Mattel to MTV, Nike to Nickelodeon, Saban to Sci-Fi Channel, Kenny mentors full-time at AnimationMentor.com.


19 April, 2011

What Kind of Workflow Do You Use? ~Nelson Brown

That's right kids.... more posting about workflow. If you've been following this blog, you're probably sick of me talking about it. This will be the last one (I promise)... maybe. One thing that's awesome about Nelson's post is how it's broken down. Real simple to follow and there are some great tips in there. Thank you so much for your notes. On that note, huge congrats to Nelson, who just had his one year anniversary at Dreamworks. Way to go man!

____________________________________________________________________

What Kind of Workflow Do You Use?


You've probably heard it said that being an animator means being a lifelong student. That couldn't be more true. My workflow is constantly changing. With every shot or task I complete, there's almost always something I end up liking or disliking about the way I went about it. Or, sometimes the technical requirements of a shot will dictate what kind of workflow I'll use. Also, observing the workflow other animators use allows me to pick up new things that I want to try with my next shot or task. The point is, finding a good workflow means trying things out until you find what works for you. I, personally, am still trying things out. However, I'll write down the workflow that I tend to use most often.

Step 1 - Research:
- Talking through the shot with the director or supervisor
- Checking out the storyboards
- Checking out the surrounding shots for continuity
- Researching any available information about character personality
- Gathering model sheets or other character resources

Step 2 - Planning:
- Shooting video reference, trying various takes and editing the best together
- Gathering online video or photo reference
- Studying reference
- Sketching rough thumbnail drawings of major poses to find the best silhouette

Step 3 - Blocking (on the computer):
- Blocking major storytelling/acting/action/key poses, most often in
stepped curves mode, and most often keying the entire character
- Blocking in extremes and changes in direction
- Blocking in important facial expressions
- Blocking in important hand poses
- Pushing poses around in time to find the right rhythm for the shot

Step 4 - Breakdowns:
- Putting in breakdown poses between major key poses, often still in stepped
- Defining rough arcs, overlap and spacing
- Repeating for the face and hands
- At this point I'm usually trying to put every major idea into a pose
- At this point if it's a dialogue shot, I will go through a similar
process on the mouth and face that I went through with the body

Step 5 - Spline
- Hitting that dreaded button to convert to spline curves (or clamped,
or linear, or auto-tangent, whatever you prefer to use)
- Usually making some slight adjustments to overall pose timing
- Shaping and cleaning curves to more accurately define spacing

Step 6 - Polishing
- Focusing on details
- Finessing contact points, often frame by frame
- Offsetting keys as necessary to refine overlap
- Layering in minor secondary action, like breathing or eye darts
- Doing anything required to make the shot as clear and refined as
the deadline will allow

Step 7 - Watching the shot get pried from your fingers and forcibly taken away
- It's rare to feel like a shot is as finished as I'd like it to be
Often deadlines come quicker than we obsessive animators would like

One final thought to keep in mind: this workflow is rarely linear.

Getting notes and changes from a director or supervisor can often mean
going back a step or two to blocking or even planning stages. It’s just
another part of the crazy process!

05 April, 2011

When Deciding on Acting Choices, What Helps you Decide on Poses? ~Josh Riley

Okay... so I have a new goal that should be obtainable. I'm going to try and complete an animation per month. I decided to kick start my goal by doing the 11 Second Club contest for April. The funny thing was is that I was just about to start thumb nailing some ideas down when I saw this posted on Shawn Kelly's Tips and Tricks Blog. I thought it was a nice quick read and a great method to kicking off your planning process (I really like the idea of writing the emotion you're going for next to the thumb nail).... This one's from a Guest Blogger Josh Riley
______________________________________________________________


I like to convey the character’s inner thoughts with posing. For instance, the character might be feeling something but not showing it in an obvious way. Maybe the face will say “mad,” but the body pose is a bit frightened, or maybe the reverse. For example, think about a mother who just found her child who had wandered off in a crowded area. Her body language might show relief, but her face might show anger. Choosing the poses carefully will go a long way, helping your character communicate complex inner feelings and depth.

I learned from Mark Behm, one of my mentors at Animation Mentor, to always write the emotions (or thoughts) out in words near your thumbnails while you are deciding on poses and planning your scene. It is a constant reminder of the goal of your posing. I can't say how many times I got into a pose and started working on a cool idea, then looked over at the word written next to my thumbnails and realized that the pose I had drawn was not communicating the original emotion. I had gotten wrapped up in creating an interesting pose and lost focus of the bigger picture. Having the emotions written out helped me to quickly make the necessary adjustments and correct the poses. Mark Behm advised me to go through this process every time, no matter how redundant it seemed. And then he disappeared in a puff of ninja smoke.

Guest Blogger Josh Riley